DIY Oculus Rift - schematics, instructions and build pics!

Post Reply
German
Binocular Vision CONFIRMED!
Posts: 209
Joined: Tue Nov 23, 2010 5:18 pm

Re: DIY Oculus Rift - schematics, instructions and build pic

Post by German »

cybereality wrote:@German: Not too shabby. OK. Well, maybe a little shabby, but its a start.
Yeah, I'll wrap it all nice in black in a little bit. I just wanted to get it up and running to make sure my dimensions were right for the new foam core lens holder I had to make for this screen. And to see what a Rift looked like for myself! These videos are pretty wild. I'm really enjoying this one:

http://www.youtube.com/watch?v=5YiGrthiHsI

It has side-by-side but not setup for Rift so the aspect ratio is wrong but still fun to watch!
German
Binocular Vision CONFIRMED!
Posts: 209
Joined: Tue Nov 23, 2010 5:18 pm

Re: DIY Oculus Rift - schematics, instructions and build pic

Post by German »

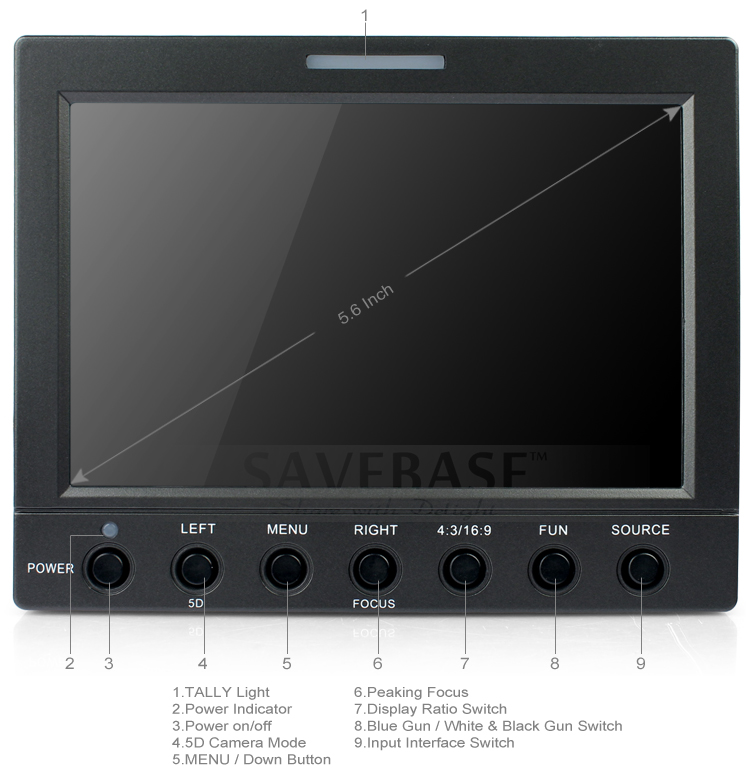
Here's the foam board template in AutoCAD DWG and PDF formats for one of those 5D II 5.6" Digital LCD 1280*800 HDMI DSLR Camera Monitor that you can get from ebay for about $216 like this:

Image

It's based on rfurlan's great template for raw LCD/controllers and has the same IPD. The way it is built, you want to cut the 5mm rabbits or channels(cut through the top layer and foam but not the bottom) on the edges of the lens holder face and then fold the side over to make a box. I use T-pins through the sides of corners after they were folded to pin them together and make them nice and square. Then you could glue or just tape it all together like I did.

Image

Image

Image
shent1080
Cross Eyed!
Posts: 101
Joined: Wed Dec 26, 2012 7:10 am

Re: DIY Oculus Rift - schematics, instructions and build pic

Post by shent1080 »

Very nice!!!
Mel
Binocular Vision CONFIRMED!
Posts: 287
Joined: Sat Nov 10, 2007 7:45 am

Re: DIY Oculus Rift - schematics, instructions and build pic

Post by Mel »

German wrote:Here's the foam board template in AutoCAD DWG and PDF formats for one of those 5D II 5.6" Digital LCD 1280*800 HDMI DSLR Camera Monitor that you can get from ebay for about $216 like this:

Image

It's based on rfurlan's great template for raw LCD/controllers and has the same IPD. The way it is built, you want to cut the 5mm rabbits or channels(cut through the top layer and foam but not the bottom) on the edges of the lens holder face and then fold the side over to make a box. I use T-pins through the sides of corners after they were folded to pin them together and make them nice and square. Then you could glue or just tape it all together like I did.
Are you finding it heavy? I used the same 'monitor' for mine, but removed the guts, and I still find it heavy. Mind you, I went with a baseball cap mounting and only a short segment of a ski mask's nose piece for nose support. If I were to do it all over again, I'd definitely go with the full ski mask approach.
German
Binocular Vision CONFIRMED!
Posts: 209
Joined: Tue Nov 23, 2010 5:18 pm

Re: DIY Oculus Rift - schematics, instructions and build pic

Post by German »

Mel wrote: Are you finding it heavy? I used the same 'monitor' for mine, but removed the guts, and I still find it heavy. Mind you, I went with a baseball cap mounting and only a short segment of a ski mask's nose piece for nose support. If I were to do it all over again, I'd definitely go with the full ski mask approach.
Yeah, it's mashing my nose bad. I added an overhead strap which helped but it's still kind of uncomfortable. I'm thinking about trying the top tripod mount with a face shield headband and a cantilevered arm to hold it.
3dvison
Diamond Eyed Freakazoid!
Posts: 718
Joined: Sun Oct 24, 2010 7:25 pm

Re: DIY Oculus Rift - schematics, instructions and build pic

Post by 3dvison »

I am building my Diy Rift using the welding helmet headgear type of design.
I put a bracket at the back of the headgear that allows me to add counter weights as needed, this lets me keep the back of the HMD balanced with the front, which is needed when I switch between the 5X plastic lenses to the heavier Leep on the cheap glass lenses.
The counter weight seems to make a nice difference in comfort.
Even when using the lighter 5x plastic lenses, I can put a small weight on, and it still makes a nice difference in comfort with those lenses also.
geekmaster
Petrif-Eyed
Posts: 2708
Joined: Sat Sep 01, 2012 10:47 pm

Re: DIY Oculus Rift - schematics, instructions and build pic

Post by geekmaster »

UPDATE: There is now a dedicated thread for this sub-topic:
Fresnel lens stack for "supernatural" FoV
http://www.mtbs3d.com/phpBB/viewtopic.php?f=140&t=16373


Although I have the recommended 5x lenses, I just tried an experiment with a cheap dollar store "Page Magnifier Bookmark" plastic fresnel lens with fine pitched ridges. It is about 2 inches tall and 6 inches wide. I cut it into 3 pieces each two inches wide and overlapped them (all with ridges toward the eye, no rotation). Then I cut out the corners to fit my nose and inner eye brow. When in focus on my Nexius 7 screen, it completely fills my horizontal FoV, including where my nose should be and as far as I can stretch my gaze away from my nose. That is more FoV than my natural FoV. Although it causes chromatic aberation on text (mostly blue), that is rarely noticeable in a game environment.

I played one of cybereality's Rift-adjusted videos from the Vireo Perception thread at fullscreen on my Nexus 7 (7-inch LCD), and it was great. If you normally wear glasses, but blurriness at the corners is less than from real glasses (even large aviator-style lenses). In fact, after having such a super-normal FoV, it makes me much more aware of my eyeglass frames (and my nose) which are obstructing FoV that I saw inside the game environment. MUCH better than I had expected, and extremely lightweight lenses.

I got the idea from an old "Virtual Reality Construction" book that came with fresnel lenses and a cardboard fold-up frame, which had a string to tape to a CRT monitor so it could hang down against the screen and to use like binoculars on a displayed stereo image. These cheap dollar store lenses are much higher quality (finer pitch) than used in that device.

By overlapping the fresnel outer edges, their extreme offset simulate looking through the edges of the 5x lenses causing more geometric distortion (desirable in this case, pushing the image beyond the nose boundary).

Any perceived distortion is quickly lost in the game environment in my experience, but it could be compensated in software (including shifting blue for chromatic aberration adjustments).

And these lenses are cheap too (only one dollar per eye from my local dollar store).

Here is the lens I used (UPC 731015162413):
http://www.dollardays.com/i789846-whole ... ml?print=1

This is a popular lens available from many stores, but most places sell it in multiples of 24:
http://www.antarespro.com/5977131-item- ... 62413.aspx

Image


I may mount my cut-down fresnel lenses very close to my eyes in modified swim goggles (also available from my local dollar store):
http://www.fishingdiscountdirect.com/pr ... direct.com

Image


And I may try attaching my Nexus 7 to dollar store saftey goggles like these (but they may need a better strap):
http://www.dollartree.com/Tool-Bench-Sa ... /index.pro
Image

Image
Last edited by geekmaster on Wed Feb 13, 2013 4:33 pm, edited 4 times in total.
Mel
Binocular Vision CONFIRMED!
Posts: 287
Joined: Sat Nov 10, 2007 7:45 am

Re: DIY Oculus Rift - schematics, instructions and build pic

Post by Mel »

Interesting stuff, geekmaster. Can you clarify the steps for how you modified the lens? A photo is worth a thousand words :-)
User avatar
Kirito
Binocular Vision CONFIRMED!
Posts: 248
Joined: Wed Dec 05, 2012 5:54 am

Re: DIY Oculus Rift - schematics, instructions and build pic

Post by Kirito »

iknow everyone on this forum loves oculus rift but isnt creating a diy rift disrespectfull in the eyes of oculus ?
Image
jf031
Cross Eyed!
Posts: 167
Joined: Fri Sep 28, 2012 4:32 pm

Re: DIY Oculus Rift - schematics, instructions and build pic

Post by jf031 »

Kirito wrote:iknow everyone on this forum loves oculus rift but isnt creating a diy rift disrespectfull in the eyes of oculus ?
Totally; that's why this thread has been going on for almost 6 months on a forum where Palmer is a moderator.

(come on)
User avatar
Kirito
Binocular Vision CONFIRMED!
Posts: 248
Joined: Wed Dec 05, 2012 5:54 am

Re: DIY Oculus Rift - schematics, instructions and build pic

Post by Kirito »

jf031 wrote:
Kirito wrote:iknow everyone on this forum loves oculus rift but isnt creating a diy rift disrespectfull in the eyes of oculus ?
Totally; that's why this thread has been going on for almost 6 months on a forum where Palmer is a moderator.

(come on)
:cry: sorry
Image
geekmaster
Petrif-Eyed
Posts: 2708
Joined: Sat Sep 01, 2012 10:47 pm

Re: DIY Oculus Rift - schematics, instructions and build pic

Post by geekmaster »

Mel wrote:Interesting stuff, geekmaster. Can you clarify the steps for how you modified the lens? A photo is worth a thousand words :-)
I held the lens stack to my eyes with my fingers. The swim goggles were just an idea. The cut down plastic cups from previous posts may actually work better, but I want to see how the swim goggles work out just to satisfy my curiosity. ;)

EDIT: I misread the post I quoted above. See my next post below for a better reply.
Last edited by geekmaster on Sun Jan 27, 2013 11:20 am, edited 2 times in total.
Mel
Binocular Vision CONFIRMED!
Posts: 287
Joined: Sat Nov 10, 2007 7:45 am

Re: DIY Oculus Rift - schematics, instructions and build pic

Post by Mel »

geekmaster wrote:
Mel wrote:Interesting stuff, geekmaster. Can you clarify the steps for how you modified the lens? A photo is worth a thousand words :-)
I held the lens stack to my eyes with my fingers. The swim goggles were just an idea. The cut down plastic cups from previous posts may actually work better, but I want to see how the swim goggles work out just to satisfy my curiosity. ;)
I guess it's that 'stacking' thing I'm asking about. You said you cut it into three pieces, so what's the stacking arrangement such that three pieces covers both eyes?
jf031
Cross Eyed!
Posts: 167
Joined: Fri Sep 28, 2012 4:32 pm

Re: DIY Oculus Rift - schematics, instructions and build pic

Post by jf031 »

I'm going to go ahead and apologize to you, Kirito. Sorry for being rude.
geekmaster
Petrif-Eyed
Posts: 2708
Joined: Sat Sep 01, 2012 10:47 pm

Re: DIY Oculus Rift - schematics, instructions and build pic

Post by geekmaster »

Mel wrote:Interesting stuff, geekmaster. Can you clarify the steps for how you modified the lens? A photo is worth a thousand words :-)
...
I guess it's that 'stacking' thing I'm asking about. You said you cut it into three pieces, so what's the stacking arrangement such that three pieces covers both eyes?
My camera battery is dead so words will have to suffice for now.

I cut the fresnel portion of the lens into three pieces about 2 inches wide. Then I stacked them with the ruler marks at top and bottom and ridges toward my face. I don't think the stacking order matters, but I stacked them left edge piece, then right edge piece, then center piece (starting from the side closest to the eye). Then I trimmed the edge toward my nose until the lens stack fit comfortably under my eye brow and overlapping the bridge of my nose. Be sure to keep the ridged (non-smooth) side of all 3 lens elements towards your eye. Then do the same with another lens stack for the other eye.
Last edited by geekmaster on Sun Jan 27, 2013 11:27 am, edited 3 times in total.
User avatar
cybereality
3D Angel Eyes (Moderator)
Posts: 11407
Joined: Sat Apr 12, 2008 8:18 pm

Re: DIY Oculus Rift - schematics, instructions and build pic

Post by cybereality »

Sounds good, geekmaster. I always thought that fresnels would work well.
geekmaster
Petrif-Eyed
Posts: 2708
Joined: Sat Sep 01, 2012 10:47 pm

Re: DIY Oculus Rift - schematics, instructions and build pic

Post by geekmaster »

cybereality wrote:Sounds good, geekmaster. I always thought that fresnels would work well.
I am surprised at how well it worked with these newer cheap fine-pitched fresnel lenses. By stacking them, I am taking advantage of the extreme off-center distortion from the edges of these 6-inch diamemeter lenses. Due to my stacking arrangement it does not stretch vertically near the edges as much as horizontally, but still it looks amazing, and the correction you used in your "rift-adjusted" video actually shows doorways as rectangular in these lens stacks. There is more chromatic abberation near the edges (mostly blue), but that could be adjusted in software. Even when I rotate my eyes in their sockets (painfully) to their extreme positions, all I can see is video (even where my nose should be), giving me a "supernatural" FoV.
:woot
For low-power devices (no GPU) I plan to use a software displacement map to do the geometric and chromatic correction, like this:

Image

I used displacement mapping like this for animated "magnifying glass" effects back in the early 90's, when 360x480 256-color VGA (Michael Abrash's "Mode X") and 386 CPUs were state-of-the-art. It should work well on low-power devices to correct for lens distortion.

BTW, the fresnel lenses that came with the cardboard "HMD" in the "Virtual Reality Creations" book were much coarser pitch than these dollar store fresnel lenses, and consequently did not work as well. Here is that book:
http://books.google.com/books/about/Vir ... AIAQAAMAAJ

And these are listed at Amazon as "new", so may even come with the fresnel googles:
http://www.amazon.com/gp/offer-listing/ ... dition=new

I have been into 3D for about 55 years now. It was always a big thing in my family. I have my grandmother's stereopticon viewer and a large collection of 3D cards for it:
Image

I was thinking about trying to stick my Nexus 7 into my stereopticon in place of a 3D card. A classic steampunk HMD, for sure... ;)
Last edited by geekmaster on Sun Jan 27, 2013 1:39 pm, edited 4 times in total.
Mel
Binocular Vision CONFIRMED!
Posts: 287
Joined: Sat Nov 10, 2007 7:45 am

Re: DIY Oculus Rift - schematics, instructions and build pic

Post by Mel »

geekmaster wrote:
Mel wrote:Interesting stuff, geekmaster. Can you clarify the steps for how you modified the lens? A photo is worth a thousand words :-)
...
I guess it's that 'stacking' thing I'm asking about. You said you cut it into three pieces, so what's the stacking arrangement such that three pieces covers both eyes?
My camera battery is dead so words will have to suffice for now.

I cut the fresnel portion of the lens into three pieces about 2 inches wide. Then I stacked them with the ruler marks at top and bottom and ridges toward my face. I don't think the stacking order matters, but I stacked them left edge piece, then right edge piece, then center piece (starting from the side closest to the eye). Then I trimmed the edge toward my nose until the lens stack fit comfortably under my eye brow and overlapping the bridge of my nose. Be sure to keep the ridged (non-smooth) side of all 3 lens elements towards your eye. Then do the same with another lens stack for the other eye.
Ahhh...two stacks of three. Gotcha, and thanks.

Gonna give this a go on my Nexus 7.
geekmaster
Petrif-Eyed
Posts: 2708
Joined: Sat Sep 01, 2012 10:47 pm

Re: DIY Oculus Rift - schematics, instructions and build pic

Post by geekmaster »

I need to get another fresnel magnifier. I only have a fresnel lens stack for one eye. I just tried the Fov2Go demo on my Nexus 7 (held in my left hand), while holding the lens stack (with taped top and bottom edges) to my right eye (close enough to brush eyelashes on it). With my left eye closed, I turned slowly around while standing, which navigated me around in the VR space of the Fov2Go demo. When turning at a casual pace, such as when exploring the scenery, it was very immersive without noticable latency. However, when turning quickly, the latency caused an immediate dizzy feeling that persists several minutes later (along with a feeling that I was punched in the stomach). It does not help that I just ate a meal a few minutes before trying this demo and I still have a full stomach.

Now, turning my head OUTSIDE the VR environment increases my vertigo. I am normally not prone to motion sickness, so perhaps the "supernatural" FoV increased my proximity to the "uncanny valley" (which is known to cause queasiness)...

I will need to turn slowly when using the Nexus 7 internal IMU (or at least the Fov2Go implementation of it). Now, I am anxious to get another fresnel magnifier, and to construct a cardboard and tape mount and shroud to hold the lenses in place at the correct position in front of my Nexus 7 display. I will try using dollar store safety goggle first, before purchasing more expensive sky goggles.

The goal here is to create a template for an extremely inexpensive add-on for an Android tablet, using locally available cheap components. Just for "fun", you know? :P

Then later I will use my 5x loupe aspheric lenses (if I can remember where I put them "away").
MSat
Golden Eyed Wiseman! (or woman!)
Posts: 1329
Joined: Fri Jun 08, 2012 8:18 pm

Re: DIY Oculus Rift - schematics, instructions and build pic

Post by MSat »

Very interesting, geekmaster! I'm trying to wrap my head around the premise of the stacked fresnels, and why it should work, but I might just have to stop by the dollar store tomorrow and see what they got to try it out for myself. What is your thought on image quality? Does it remain clear overall? Also, if they're giving a super wide FOV on a 7", would they still work well on smaller displays (I suppose this really depends on the fresnel design, correct)?
geekmaster
Petrif-Eyed
Posts: 2708
Joined: Sat Sep 01, 2012 10:47 pm

Re: DIY Oculus Rift - schematics, instructions and build pic

Post by geekmaster »

MSat wrote:Very interesting, geekmaster! I'm trying to wrap my head around the premise of the stacked fresnels, and why it should work, but I might just have to stop by the dollar store tomorrow and see what they got to try it out for myself. What is your thought on image quality? Does it remain clear overall? Also, if they're giving a super wide FOV on a 7", would they still work well on smaller displays (I suppose this really depends on the fresnel design, correct)?
How much it stretches the image depends on how close it is to your eye. Mine focuses with the triple stack at less than two inches, but I am near-sighted (myopic). YMMV. For a smaller display you may need another lens element for greater magnification.

At the "sweet spot", the image is surprisingly good with sharp focus. With different fresnels, it may not be as good a focus. I have seen many fresnel magnifiers with much coarser pitch (sginificantly fewer ridges per inch). I recommend the ones I showed in my first post on this, but at least get the finest pitch fresnel magnifier that you can find.

The angle of the lens stack is important too -- it should be roughly parallel to the screen surface (but adjust it for best image). And very close to your eye, which required trimming to clear your nose and inner eyebrow ridge. And ridges inward toward the eye for all lenses too...

The lens stack using the outer edges of the 6-inch lens scretches the image horizontal edges much more than vertical. However, and my optimum focus, the vertical (just barely) covers my full FoV. I actually lose a small amount of the horizontal image, but nothing that detracts from immersion.

I will take some pictures of the lenses and through the lenses when I get around to charging my camera battery. :mrgreen:
Last edited by geekmaster on Sun Jan 27, 2013 7:41 pm, edited 1 time in total.
MSat
Golden Eyed Wiseman! (or woman!)
Posts: 1329
Joined: Fri Jun 08, 2012 8:18 pm

Re: DIY Oculus Rift - schematics, instructions and build pic

Post by MSat »

geekmaster wrote:
MSat wrote:Very interesting, geekmaster! I'm trying to wrap my head around the premise of the stacked fresnels, and why it should work, but I might just have to stop by the dollar store tomorrow and see what they got to try it out for myself. What is your thought on image quality? Does it remain clear overall? Also, if they're giving a super wide FOV on a 7", would they still work well on smaller displays (I suppose this really depends on the fresnel design, correct)?
How much it stretches the image depends on how close it is to your eye. Mine focuses with the triple stack at less than two inches, but I am near-sighted (myopic). YMMV. For a smaller display you may need another lens element for greater magnification.

At the "sweet spot", the image is surprisingly good with sharp focus. With different fresnels, it may not be as good a focus. I have seen many fresnel magnifiers with much coarser pitch (sginificantly fewer ridges per inch). I recommend the ones I showed in my first post on this, but at least get the finest pitch fresnel magnifier that you can find.

The angle of the lens stack is important too -- it should be roughly parallel to the screen surface (but adjust it for best image). And very close to your eye, which required trimming to clear your nose and inner eyebrow ridge. And ridges inward toward the eye for all lenses too...

The lens stack using the outer edges of the 6-inch lens scretches the image horizontal edges much more than vertical. However, and my optimum focus, the vertical (just barely) covers my full FoV. I actually lose a small amount of the horizontal image, but nothing that detracts from immersion.

I will take some picture of the lenses and through the lenses when I get around to charging my camera battery. :mrgreen:
The thought of being able to get a high FOV out of smaller displays without the need for heavyish Leep-style optics is extremely interesting!

Btw, I had an English teacher back in highschool that had one of those stereopticons in his class. Coolest and most memorable teacher I ever had - even without it (but it certainly helped) :)
MaterialDefender
Binocular Vision CONFIRMED!
Posts: 262
Joined: Wed Aug 29, 2012 12:36 pm

Re: DIY Oculus Rift - schematics, instructions and build pic

Post by MaterialDefender »

@Geekmaster: how bad is the chromatic aberration with fresnels? I already wondered whether fresnel lenses might make sense some time ago, but came to the conclusion that CA would most likely be much worse than with good aspheric lenses.
geekmaster
Petrif-Eyed
Posts: 2708
Joined: Sat Sep 01, 2012 10:47 pm

Re: DIY Oculus Rift - schematics, instructions and build pic

Post by geekmaster »

MaterialDefender wrote:@Geekmaster: how bad is the chromatic aberration with fresnels? I already wondered whether fresnel lenses might make sense some time ago, but came to the conclusion that CA would most likely be much worse than with good aspheric lenses.
The chromatic aberration is mostly at the edges of the total FoV, with blue stretched farther than other colors. This causes objects to have a bluish inner edge and yellowish outer edge, mostly visible on text or other sharp high contrast content. Not very visible on "realistic" scenery such as in games. And it does not detract significantly from immersion, which is the main goal here. This is not a desktop environment. And if required, the chromatic aberration could be compensated in software.

The centers are sharp and devoid of chromatic aberration. And with head tracking, the edges are just peripheral vision and not a big problem. Just having moving VR content there (even if distorted) is vastly superior than having that portion shrouded from view. You really need to experience it. After having a "supernatural" FoV, going back to normal vision makes you very aware of the visibility of your nose, eyebrows, and cheeks as you roll your eyes around in their sockets. All those natural occlusions contain VR video with my fresnel lens stacks close to my eyes, and although those boundary pixels are somewhat distorted, they ARE part of the peripheral vison and contribute greatly to immersion.

The key to this is the very fine pitch (ridges per inch) of the fresnels I used (and recommended above). These work MUCH better than attempts in the past that used much coarser pitch (fewer ridges per inch) than these. I believe that the focus is better and the chromatic aberration is less annoying with these newer cheaper fresnel magnifiers.
Last edited by geekmaster on Mon Jan 28, 2013 1:35 pm, edited 3 times in total.
MaterialDefender
Binocular Vision CONFIRMED!
Posts: 262
Joined: Wed Aug 29, 2012 12:36 pm

Re: DIY Oculus Rift - schematics, instructions and build pic

Post by MaterialDefender »

You make me really curious... Since I'll disassemble my build anyway to put in new lenses, I guess I will try to find some good fresnels too for testing.
geekmaster
Petrif-Eyed
Posts: 2708
Joined: Sat Sep 01, 2012 10:47 pm

Re: DIY Oculus Rift - schematics, instructions and build pic

Post by geekmaster »

MaterialDefender wrote:You make me really curious... Since I'll disassemble my build anyway to put in new lenses, I guess I will try to find some good fresnels too for testing.
To get maximum FoV, the fresnels are trimmed to fit under my eyebrow ridges, and against the side of my nose. A pair of lenses actually touch together on the upper nose bridge (but below the center of the eyebrow ridge).

The images are stretched far enough the even with full FoV there is no visibility of the other half of the screen (but the outer corners are outside the FoV). When inside a game, it really is an amazing experience. Like I said, this arrangement provides a "supernatural" (beyond natural) FoV. Cutting down aspheric lenses may not provide this experience. I think it is the stacking of the outer 1/3 of 6-inch lenses with the center 1/3 that contributes to the extraordinary horizontal FoV.

Using aspherics may provide a better quality image, but at a reduced FoV. Immersion is more FoV dependent than image quality dependent, in my experience.

I have yet to try a pair of lens stacks for a stereoscopic test, but I do not see why it should be any problem.

Beware that the lens stacks must be in the "sweet spot" (try adjusting their position) or the result will be unsatisfactory. My fresnel lens stack may be optimized for my near-sighted vision, so YMMV.

If others try this, please report back...
geekmaster
Petrif-Eyed
Posts: 2708
Joined: Sat Sep 01, 2012 10:47 pm

Re: DIY Oculus Rift - schematics, instructions and build pic

Post by geekmaster »

For an understanding of why these stacked fresnel elements work like this, look up information on "eccentric fresnel". I am using one outer 1/3 of a 6-in lens to stretch the inner side of the image behind my nose. The other outer 1/3 stretches the outer edge of the FoV so all you see is pixels even when painfully rolling your eyes to the outer limits. And the inner 1/3 adds to that, and also stretches the vertical FoV above my eyebrows, and below my cheeks. It is like slicing smaller lenses from the outer edges of a large 6-inch lens, resulting in a large sidewayes stretching of the FoV.
PalmerTech
Golden Eyed Wiseman! (or woman!)
Posts: 1644
Joined: Fri Aug 21, 2009 9:06 pm

Re: DIY Oculus Rift - schematics, instructions and build pic

Post by PalmerTech »

Some pictures would be great! I have been messing around with things like this, but I want to test your actual setup. I have the fresnel lenses you used on order, should be here soon.
geekmaster
Petrif-Eyed
Posts: 2708
Joined: Sat Sep 01, 2012 10:47 pm

Re: DIY Oculus Rift - schematics, instructions and build pic

Post by geekmaster »

PalmerTech wrote:Some pictures would be great! I have been messing around with things like this, but I want to test your actual setup. I have the fresnel lenses you used on order, should be here soon.
Cool! I need to find my camera battery charger now...

EDIT: Found it. Charging...
3dvison
Diamond Eyed Freakazoid!
Posts: 718
Joined: Sun Oct 24, 2010 7:25 pm

Re: DIY Oculus Rift - schematics, instructions and build pic

Post by 3dvison »

geekmaster wrote:
PalmerTech wrote:Some pictures would be great! I have been messing around with things like this, but I want to test your actual setup. I have the fresnel lenses you used on order, should be here soon.
Cool! I need to find my camera battery charger now...

EDIT: Found it. Charging...
That would be great, because I am not sure where the cut edges go ? Are the three stacked one on top of the other or are they butted edge to edge or even if they are shifted a little left and right, can't you then see the edges of the center fresnel ?
geekmaster
Petrif-Eyed
Posts: 2708
Joined: Sat Sep 01, 2012 10:47 pm

Re: DIY Oculus Rift - schematics, instructions and build pic

Post by geekmaster »

3dvison wrote:
geekmaster wrote:
PalmerTech wrote:Some pictures would be great! I have been messing around with things like this, but I want to test your actual setup. I have the fresnel lenses you used on order, should be here soon.
Cool! I need to find my camera battery charger now...

EDIT: Found it. Charging...
That would be great, because I am not sure where the cut edges go ? Are the three stacked one on top of the other or are they butted edge to edge or even if they are shifted a little left and right, can't you then see the edges of the center fresnel ?
As I mentioned earlier, I cut the 6-inch wide lens into 3 2-inch wide lenses then stacked them face-to-face with the ridges all toward the eye. I trimmed the edge against my nose and eyebrow so it all touches the skin of my nose, under my eyebrow, and my cheek.

I just looked into a mirror while holding my lens stack to my face and I see that it touchs the corner of my nose where it joins the cheek above my lip.

My battery is not done charging, but it may be enough to take a photo... I will try that.

EDIT: Okay, the camera works. Now, where is my lens stack? I was just playing with it a half hour ago. I cannot find it anywhere! Getting old sucks! Time to go to the dollar store and get some more fresnel magnifiers. I need a lens stack for the other eye anyway, so now I need to make two sets... :(
3dvison
Diamond Eyed Freakazoid!
Posts: 718
Joined: Sun Oct 24, 2010 7:25 pm

Re: DIY Oculus Rift - schematics, instructions and build pic

Post by 3dvison »

geekmaster wrote:As I mentioned earlier, I cut the 6-inch wide lens into 3 2-inch wide lenses then stacked them face-to-face with the ridges all toward the eye.:(
Thanks, I read your post but for some reason I thought you had the right and left lenses feathered/shifted outward left/right. But they are not, they are just stacked one on top of the other.
Last edited by 3dvison on Mon Jan 28, 2013 5:28 pm, edited 1 time in total.
User avatar
Fredz
Petrif-Eyed
Posts: 2255
Joined: Sat Jan 09, 2010 2:06 pm
Location: Perpignan, France
Contact:

Re: DIY Oculus Rift - schematics, instructions and build pic

Post by Fredz »

geekmaster wrote:I got the idea from an old "Virtual Reality Construction" book that came with fresnel lenses and a cardboard fold-up frame
This one I guess ? :
6115369086_3052cb0a09_z.jpg
You do not have the required permissions to view the files attached to this post.
geekmaster
Petrif-Eyed
Posts: 2708
Joined: Sat Sep 01, 2012 10:47 pm

Re: DIY Oculus Rift - schematics, instructions and build pic

Post by geekmaster »

Fredz wrote:
geekmaster wrote:I got the idea from an old "Virtual Reality Construction" book that came with fresnel lenses and a cardboard fold-up frame
This one I guess ? :
...
Yes, that is the one that gave me the idea to try this. I still have it, but the lenses fell out of it. They are around somewhere. That tab on top has a red string tied to it (included in the kit), which gets taped on top of the CRT so that you can hang it down over the screen and use it without holding it, or place it on top of the CRT when not using it. It worked fairly well, but you had to lean into it to use it, and you had to size and center your 3D image pair to fit into it.

Those were very coarse pitched fresnel lenses, and the ones I used for this experiment are very fine pitched (so much better image). Also, to get the maximum area of the screen in focus, I am holding them roughly parallel to the screen surface.

I just bought 16 more lenses to play with. I just cut one up and got a couple of photos before my battery was dead again. I lost my original charger while travelling, and this replacement charger takes forever and does not seem to give a full charge... :-(

I have a photo of it held up to my left eye, taken while looking in a mirror, so you can see how it touches the underside of my eyebrow ridge, and the side of my nose down to my cheek, and part of my cheek... I need to stack them together and trim their edge to match the curve now cut into one of them, then take more photos.

Now, I need to charge my camera battery overnight, and I need to find my microSDHC card reader so I can post the photos I have thus far... :-(
3dvison
Diamond Eyed Freakazoid!
Posts: 718
Joined: Sun Oct 24, 2010 7:25 pm

Re: DIY Oculus Rift - schematics, instructions and build pic

Post by 3dvison »

OK, I my be slow on the up take, but this is what seems to work for me, and it may well be what has been said here all along but I just did not understand it.

Found what seems to be very close to the same lenses at Office Depot.
For me using the center portion is what gives the best image. So if you wanted a 2inch dia lens you would start at the 3inch mark which is the center of the 6inch lens and go 1 inch left of the 3inch mark and cut and 1 inch right of the 3inch mark and cut.

So I needed 3 full 6inch lenses to make 1 lens. The lens is made from 3 identical lenes all cut from the center portion of a 6inch fresnel..
geekmaster
Petrif-Eyed
Posts: 2708
Joined: Sat Sep 01, 2012 10:47 pm

Re: DIY Oculus Rift - schematics, instructions and build pic

Post by geekmaster »

3dvison wrote:OK, I my be slow on the up take, but this is what seems to work for me, and it may well be what has been said here all along but I just did not understand it.

Found what seems to be very close to the same lenses at Office Depot.
For me using the center portion is what gives the best image. So if you wanted a 2inch dia lens you would start at the 3inch mark which is the center of the 6inch lens and go 1 inch left of the 3inch mark and cut and 1 inch right of the 3inch mark and cut.

So I needed 3 full 6inch lenses to make 1 lens. The lens is made from 3 identical lenes all cut from the center portion of the larger 6inch fresnel..
I will have to try that. I started with one fresnel magnifier. It is cut at the 2 and 4 inch marks, just like yours. It works well enough, but perhaps your stack of 3 centers would be even better...

Using the eccentric (off-center) edges requires keeping the ridges toward the eye. Otherwise the image distortion is not correct to compensate for the Rift-adjusted images.

With eccentric lense, the image can stretch beyond normal facial occlusions such as the nose. It that the same for only using lens centers?
3dvison
Diamond Eyed Freakazoid!
Posts: 718
Joined: Sun Oct 24, 2010 7:25 pm

Re: DIY Oculus Rift - schematics, instructions and build pic

Post by 3dvison »

Ah Ha,
My stack has the ridges facing away from the eye.
I was testing it with pre-warped Rift photos.

The advantage of this stack over a regular round lens, is the rectangular shape, you dont feel like you are looking through a port hole.
geekmaster
Petrif-Eyed
Posts: 2708
Joined: Sat Sep 01, 2012 10:47 pm

Re: DIY Oculus Rift - schematics, instructions and build pic

Post by geekmaster »

3dvison wrote:Ah Ha,
My stack has the ridges facing away from the eye.
I was testing it with pre-warped Rift photos.

The advantage of this stack over a regular round lens, is the rectangular shape, you dont feel like you are looking through a port hole.
Try the eccentric (edge) portions in your stack, with the ridges facing toward your eye. Be sure to cut notches for your nose and eyebrow ridge in the inner edges (but not too much or you lose too much of the outer edge). I was actually holding mine below the eyebrow inward toward the eye. The key to stretching half of a 7-inch screen to full FoV is getting it very close to the eye, which requires trimming a little to fit the nose and inner eyebrow ridge...

Because the lens portion of my magnifiers is a bit larger than 6-inches, my elements were about 1/8-inch wider than 2-inches.

I still think the eccentric portions from the outside of the 6-inch lens are important to get the full FoV that I am describing. One side stretches the inner image beyond the nose with none of the other image visible (and not even the nose visible). The other side stretches the outer image to the edge of the lens stack without showing the left border of the video image. The center part gets rid of the top and bottom margins...

I have not tried 3 centers yet. I bought 16 more magnifiers so I will try various arrangements to see if I can improve on it.
marwood82
One Eyed Hopeful
Posts: 3
Joined: Mon Jan 07, 2013 9:36 am

Re: DIY Oculus Rift - schematics, instructions and build pic

Post by marwood82 »

Hi,

bit of a noob question, but i couldn't see it mentioned in this thread,(i did look so sorry if i've missed it this threads gotten quite big!)

i've got the HV056WX1-100 display and the NT68674.5A controller board which i think others here are using.
however mine didn't come with a datasheet.

what voltage power supply are people using with this board and screen combo? (my variable dc power adapter goes from 3.5v to 12v but i don't want burn anything out)
German
Binocular Vision CONFIRMED!
Posts: 209
Joined: Tue Nov 23, 2010 5:18 pm

Re: DIY Oculus Rift - schematics, instructions and build pic

Post by German »

Just wanted to say thanks to all you guys who posted about their builds in this thread. The information was very helpful in getting my DIY up and running. Special thanks to rfurlan for the excellent template that got me halfway to making my own. Also, thanks to djdevin for posting that monitor config and the original link to the all-in-one 5.6" monitor on ebay. Of course, thank you Palmer for everything. :)
Post Reply

Return to “Oculus VR”